

Entities
An entity is a typed piece of information in your investigation: a person, an email, an IP address, a social media account, etc.
Create an entity
Click Add entity in the toolbar to open the creation form.
If one or more entities are selected when you open the form, you can link the new entity to them (an optional relationship label applies to all): a relationship is created from each selected entity to the new one. With no selection, no link is offered.
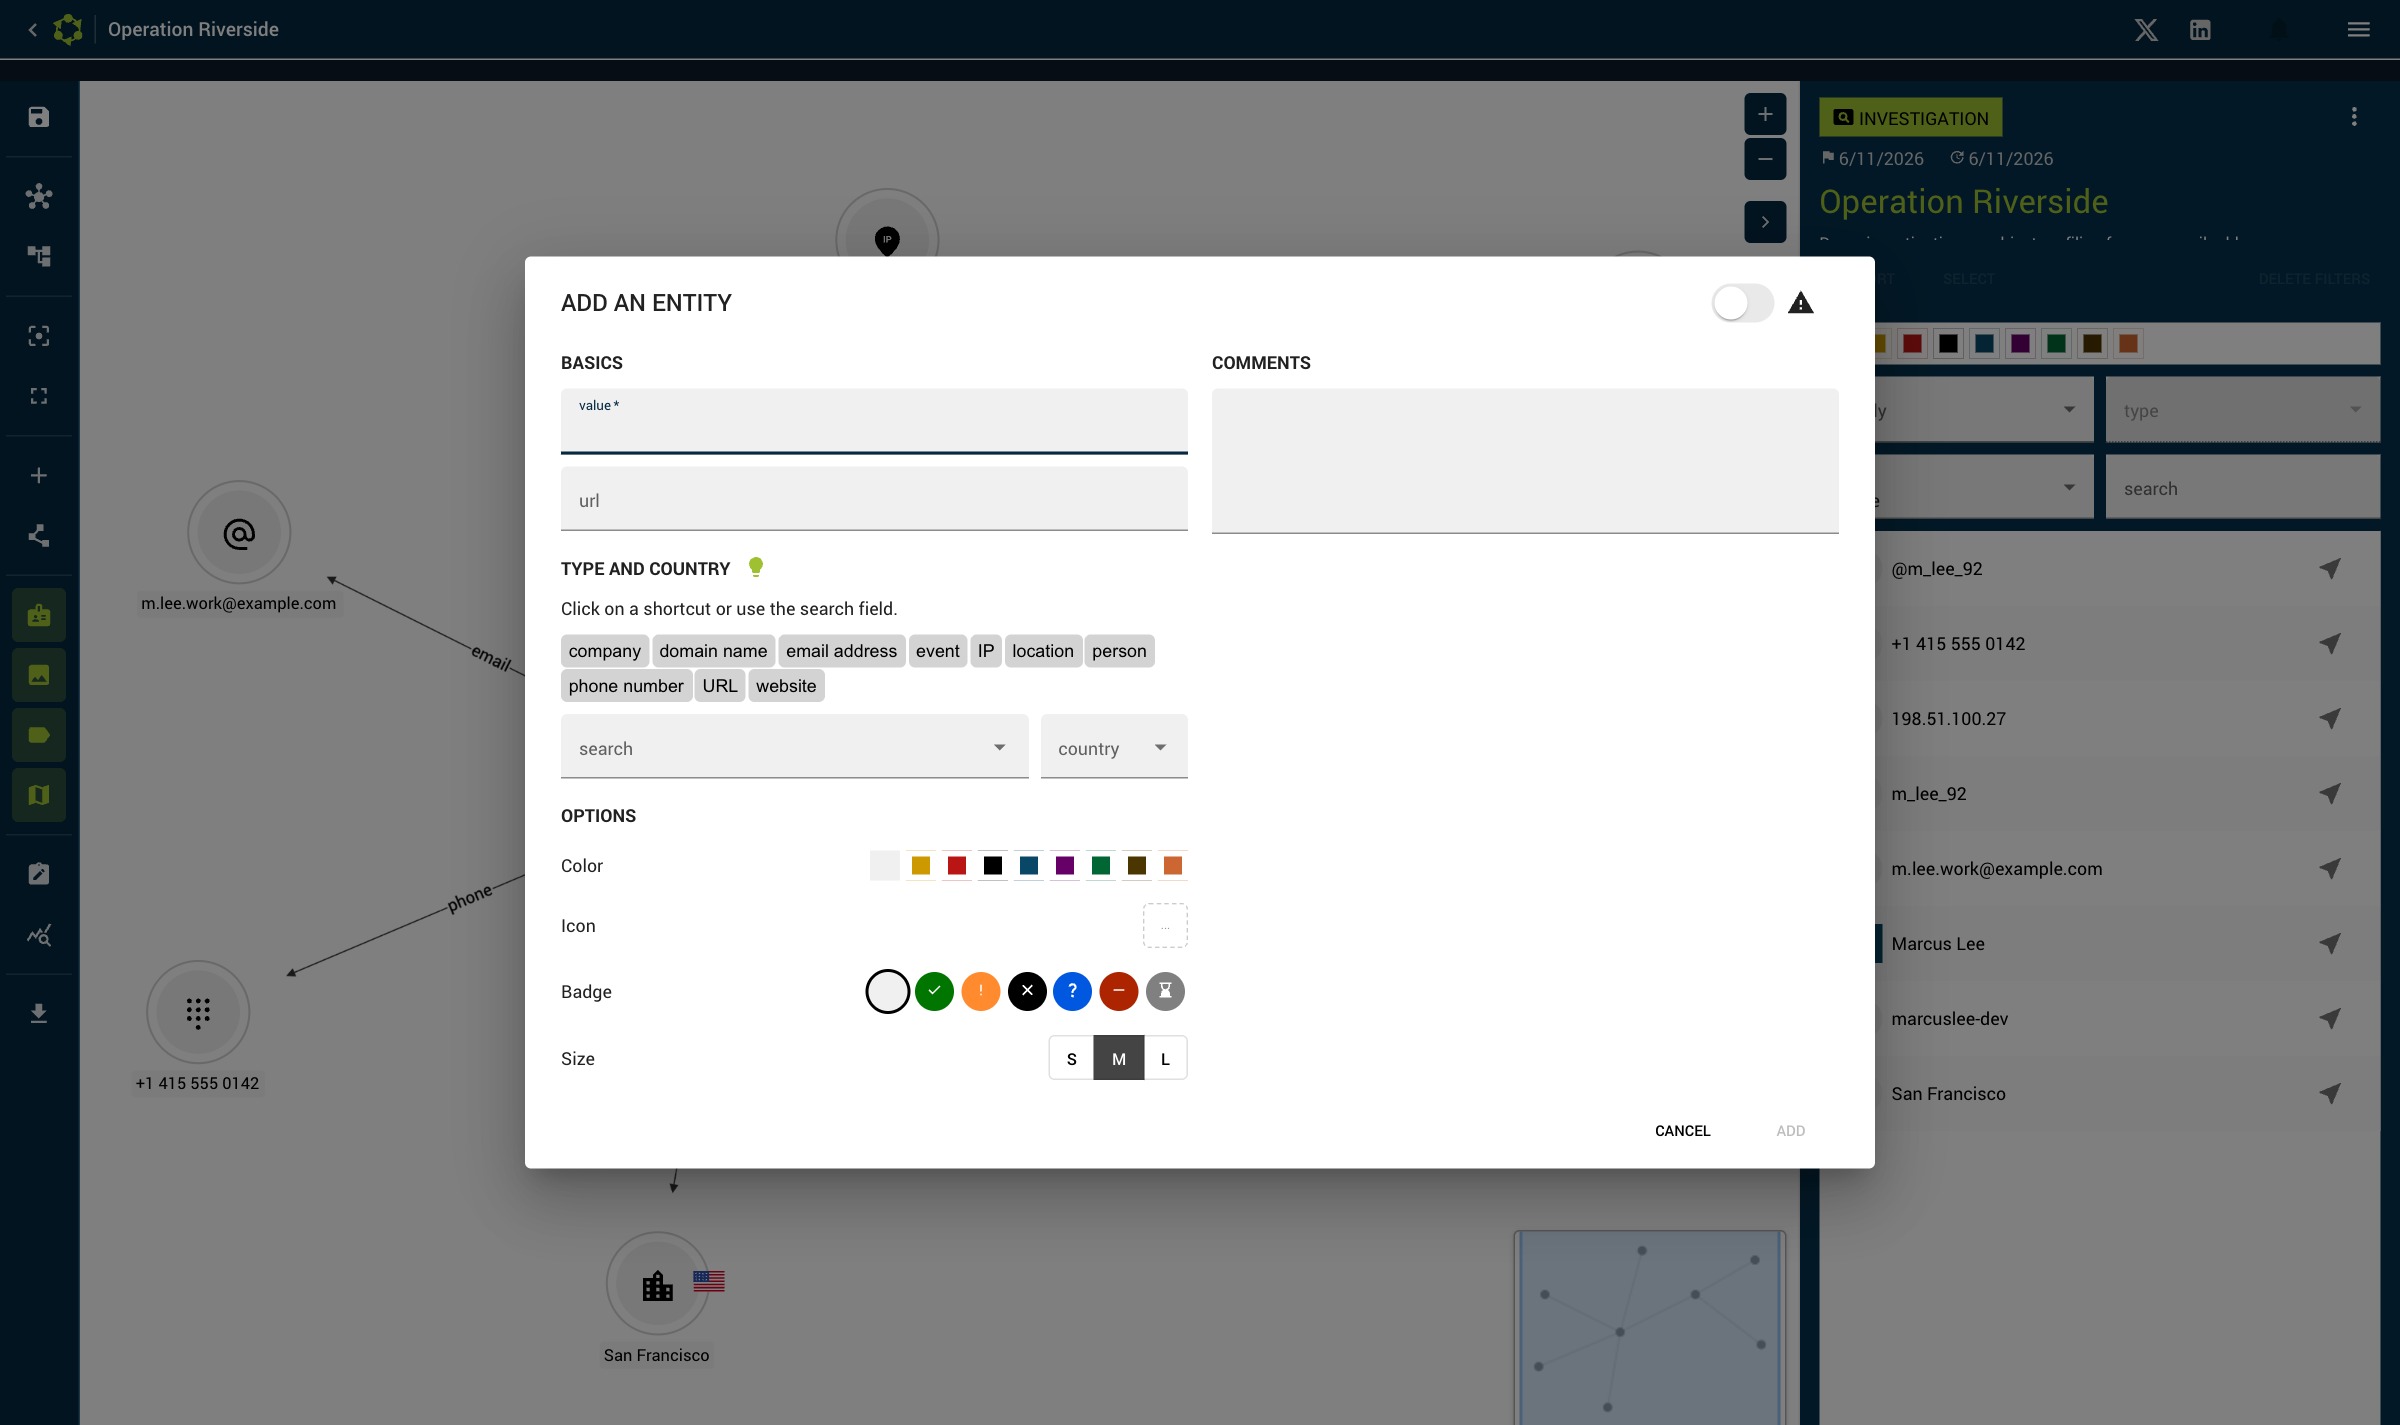
Basic information
| Field | Required | Description |
|---|---|---|
| Type | Yes | Entity family + type (e.g. Generic > Email Address) |
| Value | Yes | The main data (e.g. john@example.com) |
| Alias | No | Alternative name shown instead of the value |
| Description | No | Contextual notes |
| Image | No | Associated photo or visual |
| Custom icon | No | Replaces the type's default icon |
The Type is filled in for you:
- when the Value is recognised as an email, an IP address, a domain, or a phone number in international format (e.g.
+33 6 12 34 56 78); - when the URL points to a known platform (Instagram, Facebook, LinkedIn, X/Twitter, TikTok, Telegram, YouTube, Snapchat, WhatsApp, GitHub, Discord, VK, Skype, Signal…).
For an international phone number, the entity's country is also set automatically from the calling code (+33 → France, +1 → United States…). You can always override the type and the country.
Visual attributes
| Attribute | Options |
|---|---|
| Size | S, M (default), L |
| Color | 8 colors + default family color |
| Progress badge | Done, Exclamation, False positive, Question, Stop, Pending |
Analysis attributes
| Attribute | Description |
|---|---|
| Critical | Red outline on the node |
| Rating | 0 to 3 (affects relationship thickness) |
| Evaluation | Colored bands based on the value |
Add multiple entities (bulk paste)
When you have a list of values to add at once — emails, usernames, IP addresses, phone numbers… — use Add multiple entities in the toolbar (the list-with-plus icon) instead of creating them one by one.
- Paste your list in the text area, one value per line. Blank lines are ignored, and duplicate values are kept (each line becomes its own entity).
- Each line is typed automatically when it is recognised as an email, an IP address or a domain. Anything else uses the default type you choose below the text area — quick type shortcuts (your recent and main types) set that default type in one click.
- The preview on the right lists every entity with its resolved type. Click a line's type to override it individually; a reset action returns it to automatic. Lines still without a type are highlighted and are not added until one is set.
- Batch options are applied to every created entity: country, color, badge, custom icon, and node size.
- Link the new entities to a parent (with an optional relationship label). If an entity was selected when you opened the dialog, it is used as the parent; otherwise you can search and pick any existing entity as the parent. Linked entities are laid out in rings around the parent; with no parent they are placed on a grid in the current view.
Click Add to create them all at once.
Paste an image (clipboard)
You can paste an image directly into the graph with Ctrl+V (for example a screenshot or a photo copied from a browser). The behavior depends on the selection:
- An entity is selected → the pasted image becomes that entity's image, immediately.
- No entity selected → the entity creation dialog opens with the image already filled in, the type preset to Image and full-image display enabled. You just have to complete the value and confirm.
Pasting is ignored when the cursor is in a text field (so it does not interfere with normal text pasting).
Representation on the graph
Each entity is a node whose:
- Icon matches its type
- Background color matches its family (or a custom color)
- Shape is defined by the type (round, rectangular, etc.)
- Label (optional) shows its value below the node
For Image entities, you can enable full-node image display from the detail panel or the creation dialog.
Entity detail panel
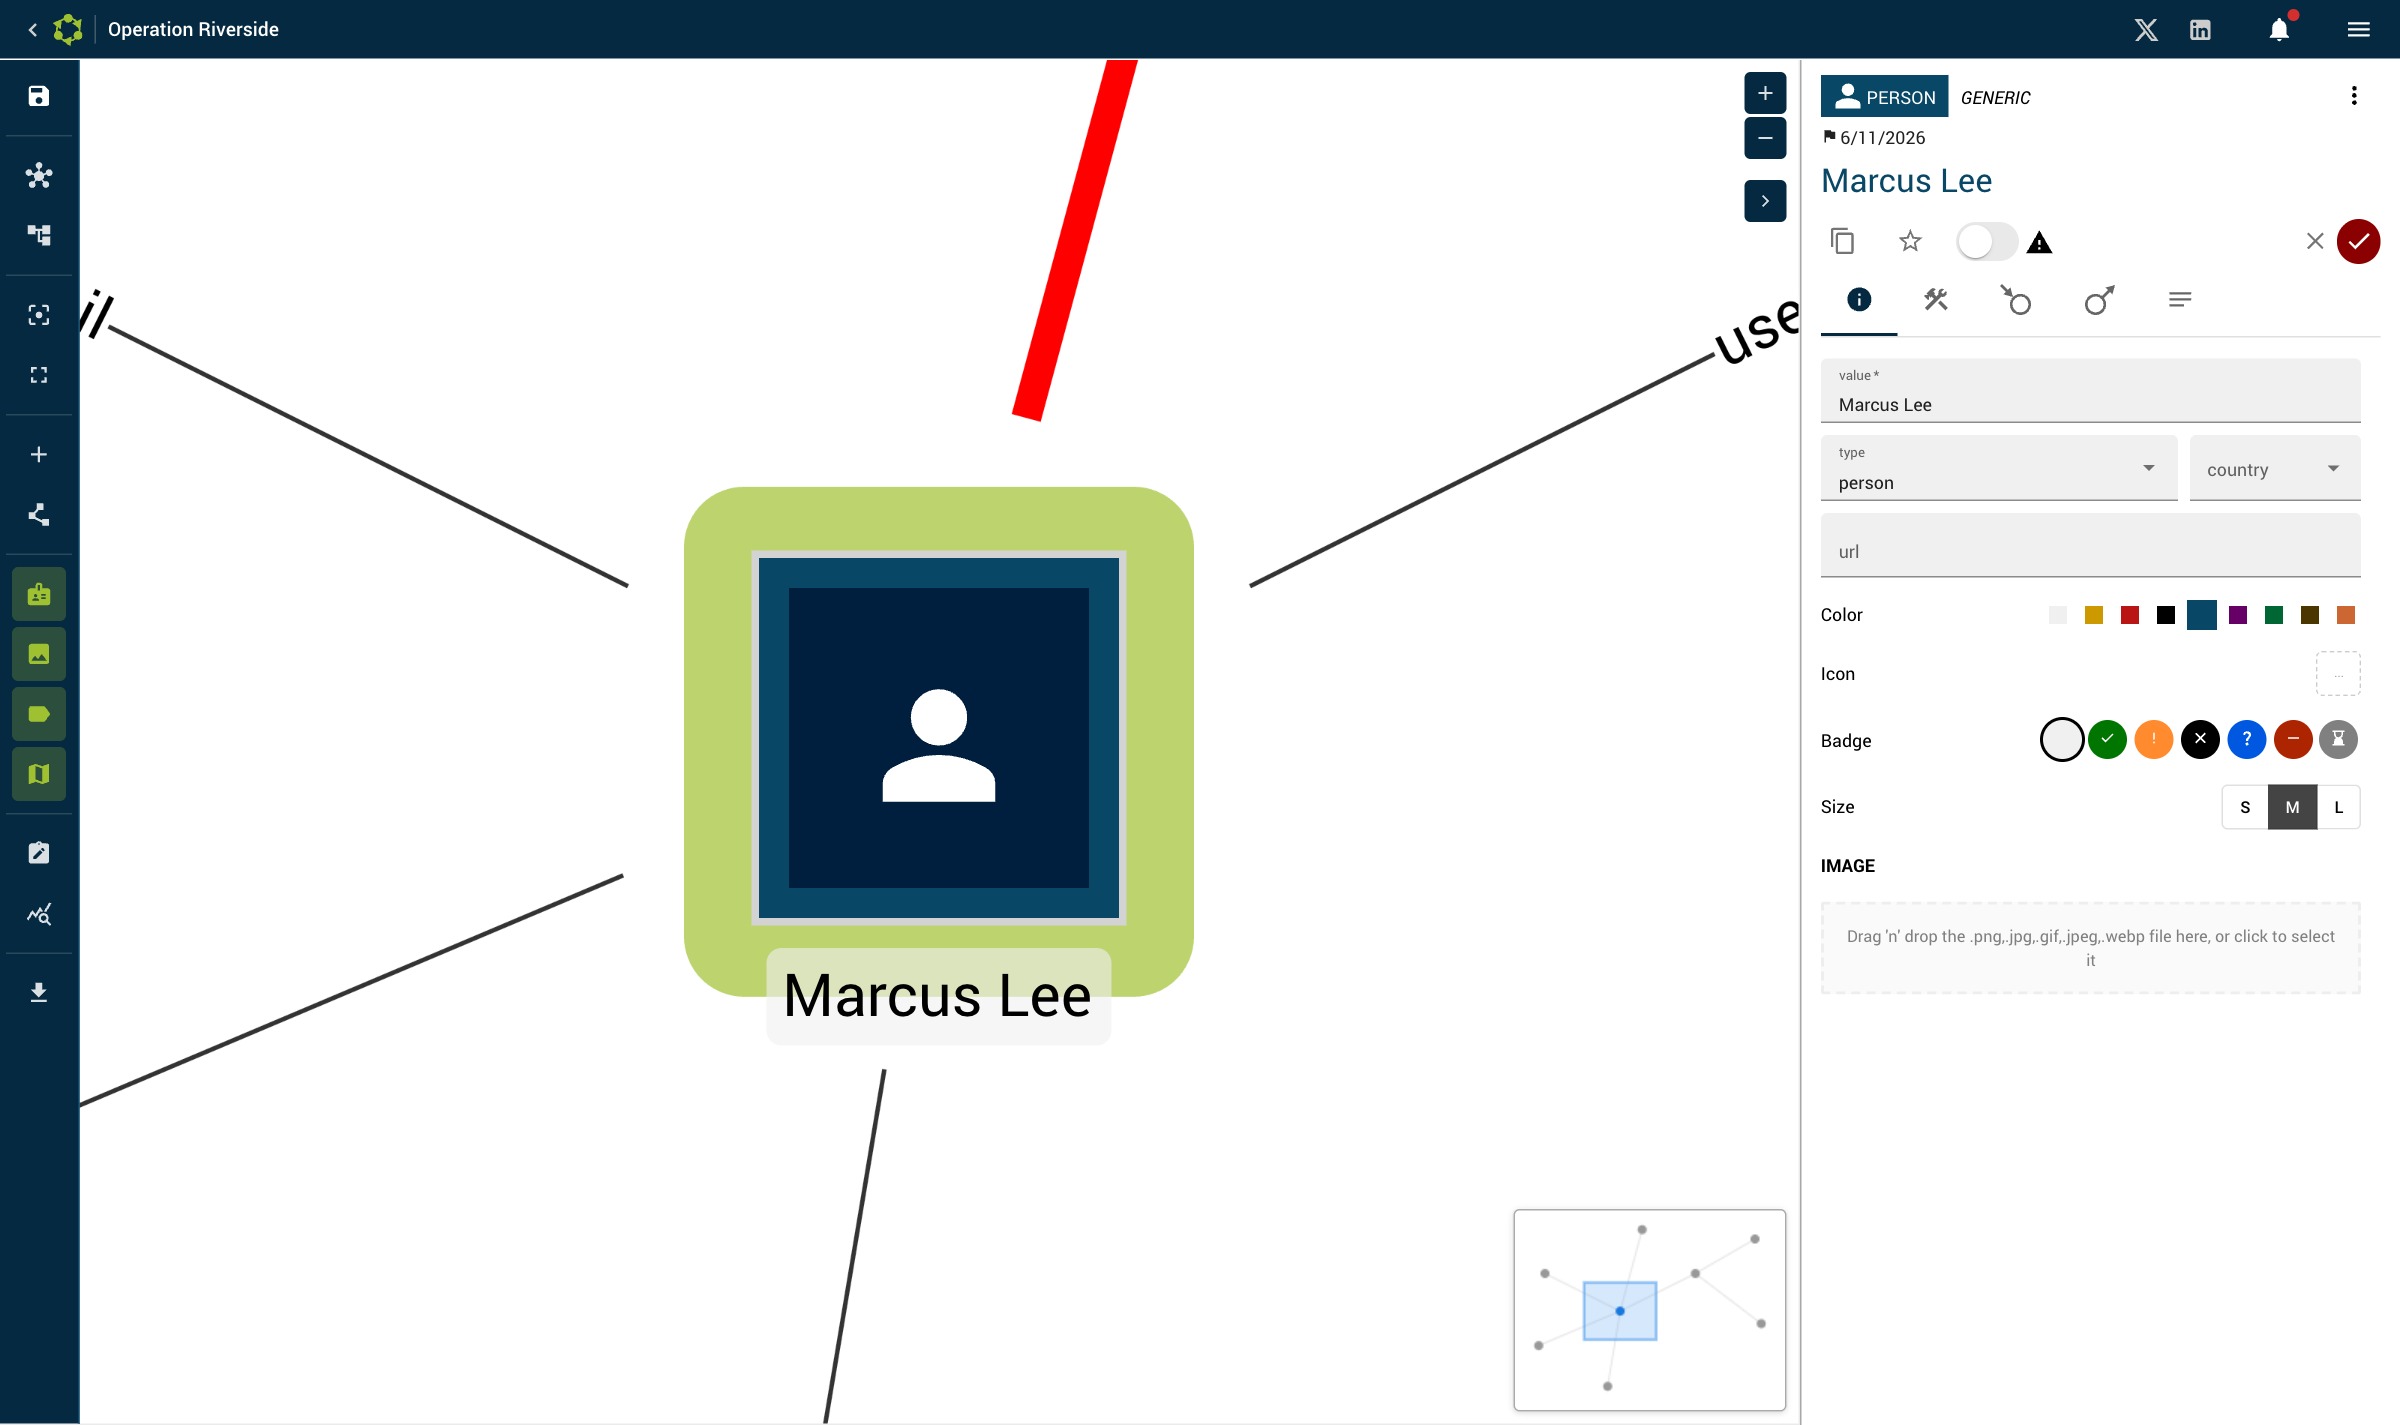
Click a node to show the detail panel in the right side area. It contains:
- The basic information (value, alias, description)
- The associated image (if any)
- The visual and analysis attributes
- The relationships linked to this entity
- The resource progress (status per OSINT tool)
- The associated notes
- The OSINT connectors available for this entity type
Edit and delete an entity
Edit any field directly in the detail panel — changes are saved automatically (no Save button). Delete an entity from the panel's menu or the context menu (right-click on the node).
Duplication
Ctrl+D on a selected node, or via the context menu. The copy is positioned next to the original node.
Multiple selection
Hold Shift and click several nodes, or draw a selection rectangle. You can also select several entities from the filtered list in the side panel.
With a multiple selection, the panel shows grouped actions: change the size, color, badge, or delete all selected elements.